If you’re the type of knitter that runs when confronted with a project that calls for more than one color in search of a unicolor project because, “I get mixed up with more than one skein of yarn”, then we are here to rescue you with an easy tutorial on how to add vertical stripes to your knitting using a second color. Impossible? No, you can knit the base in one color, the way you like to, without worrying about tangling up two skeins of yarn, and when you’re done you can add stripes using a crochet hook. Magic, quick, and really easy to do, just the way we like it.

For this tutorial you will need two different colors of yarn: one you will use to knit the base of your project, and the other, in a contrasting color, you will use to make the stripes. We used some skeins of our Pima cotton. We also used a pair of our size 8 (5 mm) knitting needles and one of our crochet hooks in the same size. Don’t forget a tapestry needle to weave in the ends.

The first thing we’ll do is knit a piece that will be the background for the stripes, which we will add later on top (we will explain how to do this step-by-step).
Cast on as many stitches as you want. It doesn’t matter if it’s an even or odd number of stitches 🙂

Start by knitting your base in stockinette stitch, but remember: on the knit side, purl where you want to later add your vertical stripes, and on the purl side, knit those same stitches where you will add your stripes.

You can space your stripes evenly across your work, or space them randomly along your knitting, however you want to. Just remember, no matter where you are going to place your stripes, always follow the instructions in the previous step.

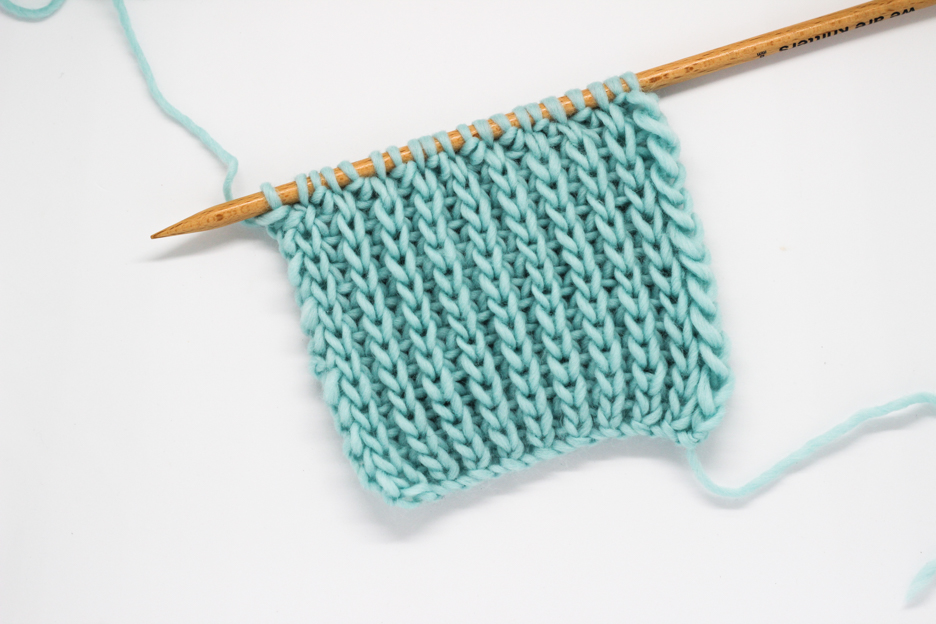
This is how the “spaces” where you will later add the stripes should look once you finish knitting the base.
First steps to start a vertical stripe

Thread the tapestry needle with the contrasting colored yarn as shown in the image above: so that a loop is formed on the left side of the needle. It doesn’t matter if the loop is a too big, we’ll tighten it up in the next step.

Insert the needle into the cast on edge. Keep in mind that we are starting the vertical stripe so we want it as close to the edge as possible

When you insert the needle the loop is folded in half, so keep pulling gently until the loop is pulled out completely and looks like the image below.

Remove the tapestry needle now that you have the loop right where we will start to make the vertical stripe. Pick up your crochet hook and get started 🙂
As you can see, you will be making a slip stitch in each row by inserting the hook in the holes in between the purl bumps.
To make it easier to make the stripe remember to rotate the base a little bit. We’re used to working rows of crochet from one end to the other, not vertically, so rotating your work will make it easier. At first it might be hard to see where you have to pick up the yarn with the crochet hook since your left hand is under your work, so: don’t worry if you have to lift up the fabric a little to see where to catch the yarn and pull it through to the front.
Now we are going to see how to finish the stripe so it blends in seamlessly.

Take the crochet hook out of the loop and pull the loop. Thread the loop onto the tapestry needle as shown in the image above.

Insert the needle from the right side to the wrong side underneath the cast off edge.

Once you are done you will see how the stripe is completely integrated into the base that we knitted.

Remove the tapestry needle from the loop and cut the yarn, leaving a yarn tail long enough to weave in the end.

Insert the needle through the loop from back to front.

Pull the yarn until the loop is tightened.

Turn your work and finish the vertical stripe by weaving in the end.

Your vertical stripe is done! Just like we promised: no working with two skeins, no tangled yarn, and as easy as can be. We hope to see your projects using this technique, so be sure to tag us when you share your projects on social media using the hash tag #weareknitters.